Basics of Navigating the Report Management Tools & Screen
Accessing the Report Management page will give those with accessibility rights the ability to review individual reports, submit additional details to complete the report, and access useful functionality and enhancement tools.
Basics of Navigating the Report Management Tools & Screen
Accessing the Report Management page will give those with accessibility rights the ability to review individual reports, submit additional details to complete the report, and access useful functionality and enhancement tools. For more information on User Roles & Permissions, click here.
Report Details
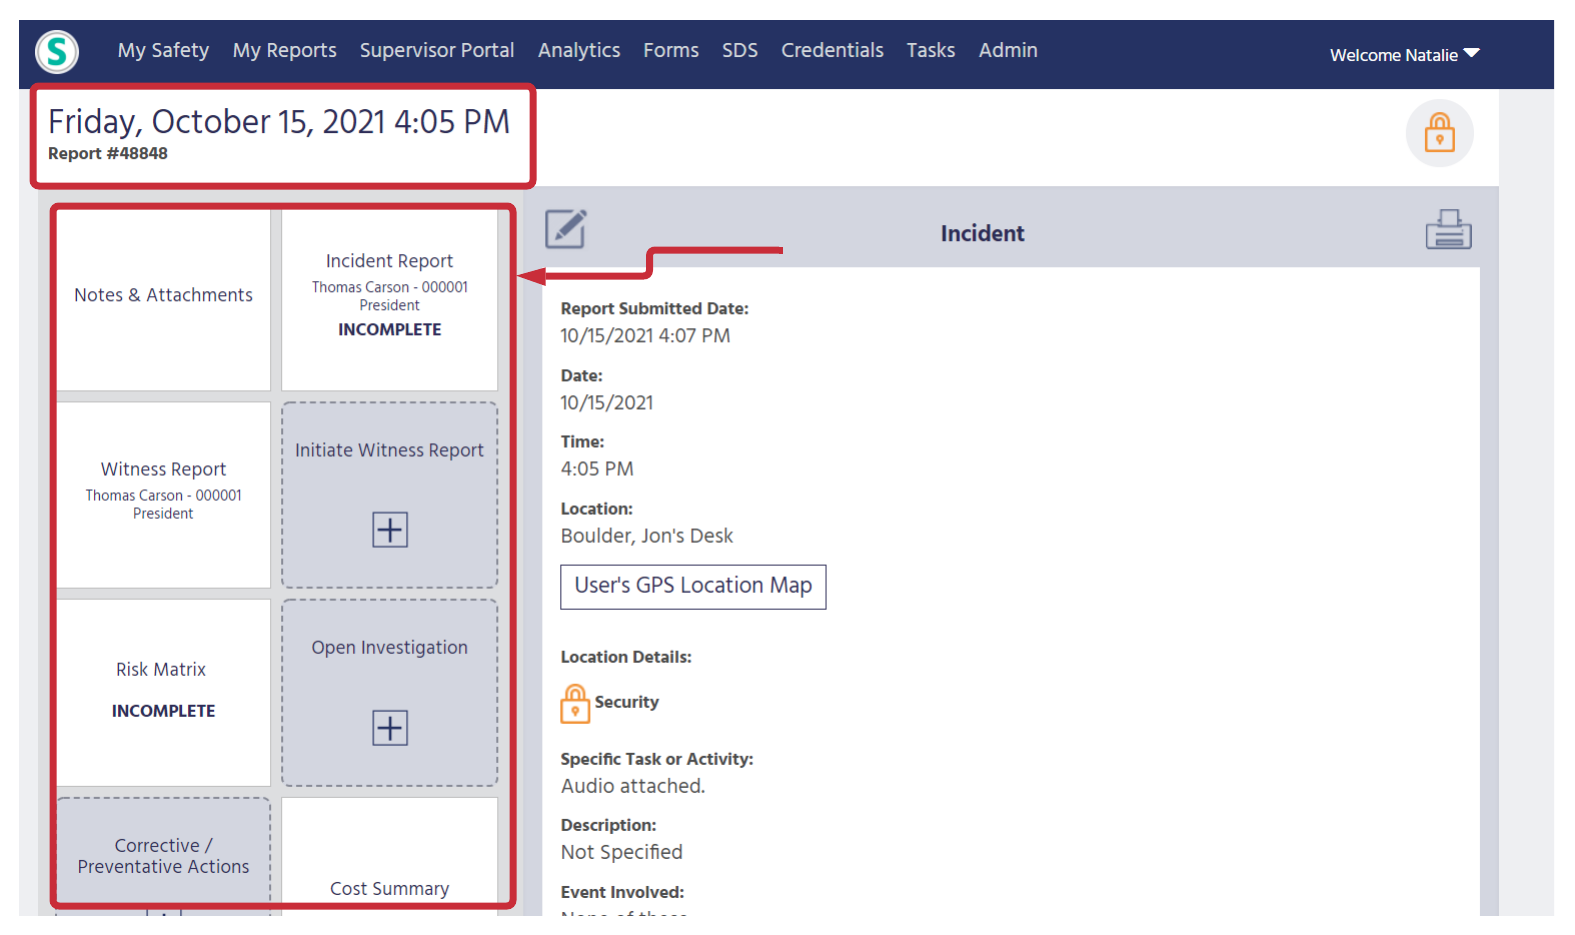
At the top left of the Report Management page, you will see the details of the report: incident date and time and incident Id number.
Report Management Menu
Below the date, time, and incident ID number, on the left-hand side of the screen, you will see a menu of tiles. Clicking on a tile will load specific functionality options that will appear on the right of the page.
Report Details Tile
The second tile from the left will be the type of report that was submitted. To see the report details and to add information, click the Report tile.-png.png)
For detailed instructions on managing different types of reports, click the links below:
(Managing Injury Reports Link)
(Managing Motor Vehicle Reports Link)
(Managing Property Damage Link)
(Managing Environmental Damage Link)
(Managing Security Threats Link)
Report Management Tools
The other tiles in the menu access optional tools with specific functionalities to enhance the reporting process. For more details on the functions of each of these tools, click on the link below:
(Corrective/Preventative Actions Link)
NOTE: Depending on your role assigned to your profile and details of the report, you may or may not see all of these options on the Report Management Tool menu.
Administrative Options
At the top right of the page, you will see four options: Generate Summary, Print All, Close Report, and Delete Report.

Generate Summary
For more instructions on how to generate a summary, click here.
Print All
You have the option to print the following sections of the report: Statement, Risk Matrix, Investigation, Corrective/Preventative Action, Cost Summary, and Notes.
- To make your print selections, click Print All.
- A pop-up window will appear in Print Sections.
- Select the sections of the Report that you would like to print by clicking and highlighting the section.
- You may select more than one section (Using a PC, press and hold the Ctrl key while clicking your selections. Using a Mac, press and hold the Command key while clicking your selections.)
- Once selections are highlighted, click Print Selected.
- Your computer will open a new page with the sections of the report that you selected to print.
- Use your computer's printing options to print the page.
- To cancel the print option, click Cancel.
NOTE: After clicking a management tool tile from the menu on the left, the details of that reporting tool will open on the right of the page. You have the option of printing that specific section by clicking the printer icon found on the top right.
Close Report
For more details on how and when to close a report, click here.
Delete Report
- To delete the Report, click Delete Report.
- A pop-up window will appear, “Are you sure you’d like to delete this incident?”
- If you are sure you would like to delete the report, click Yes.
- If you do not want to delete the report, click No and you will be returned to the Report Management page.
