Creating Employee Groups for Credentials
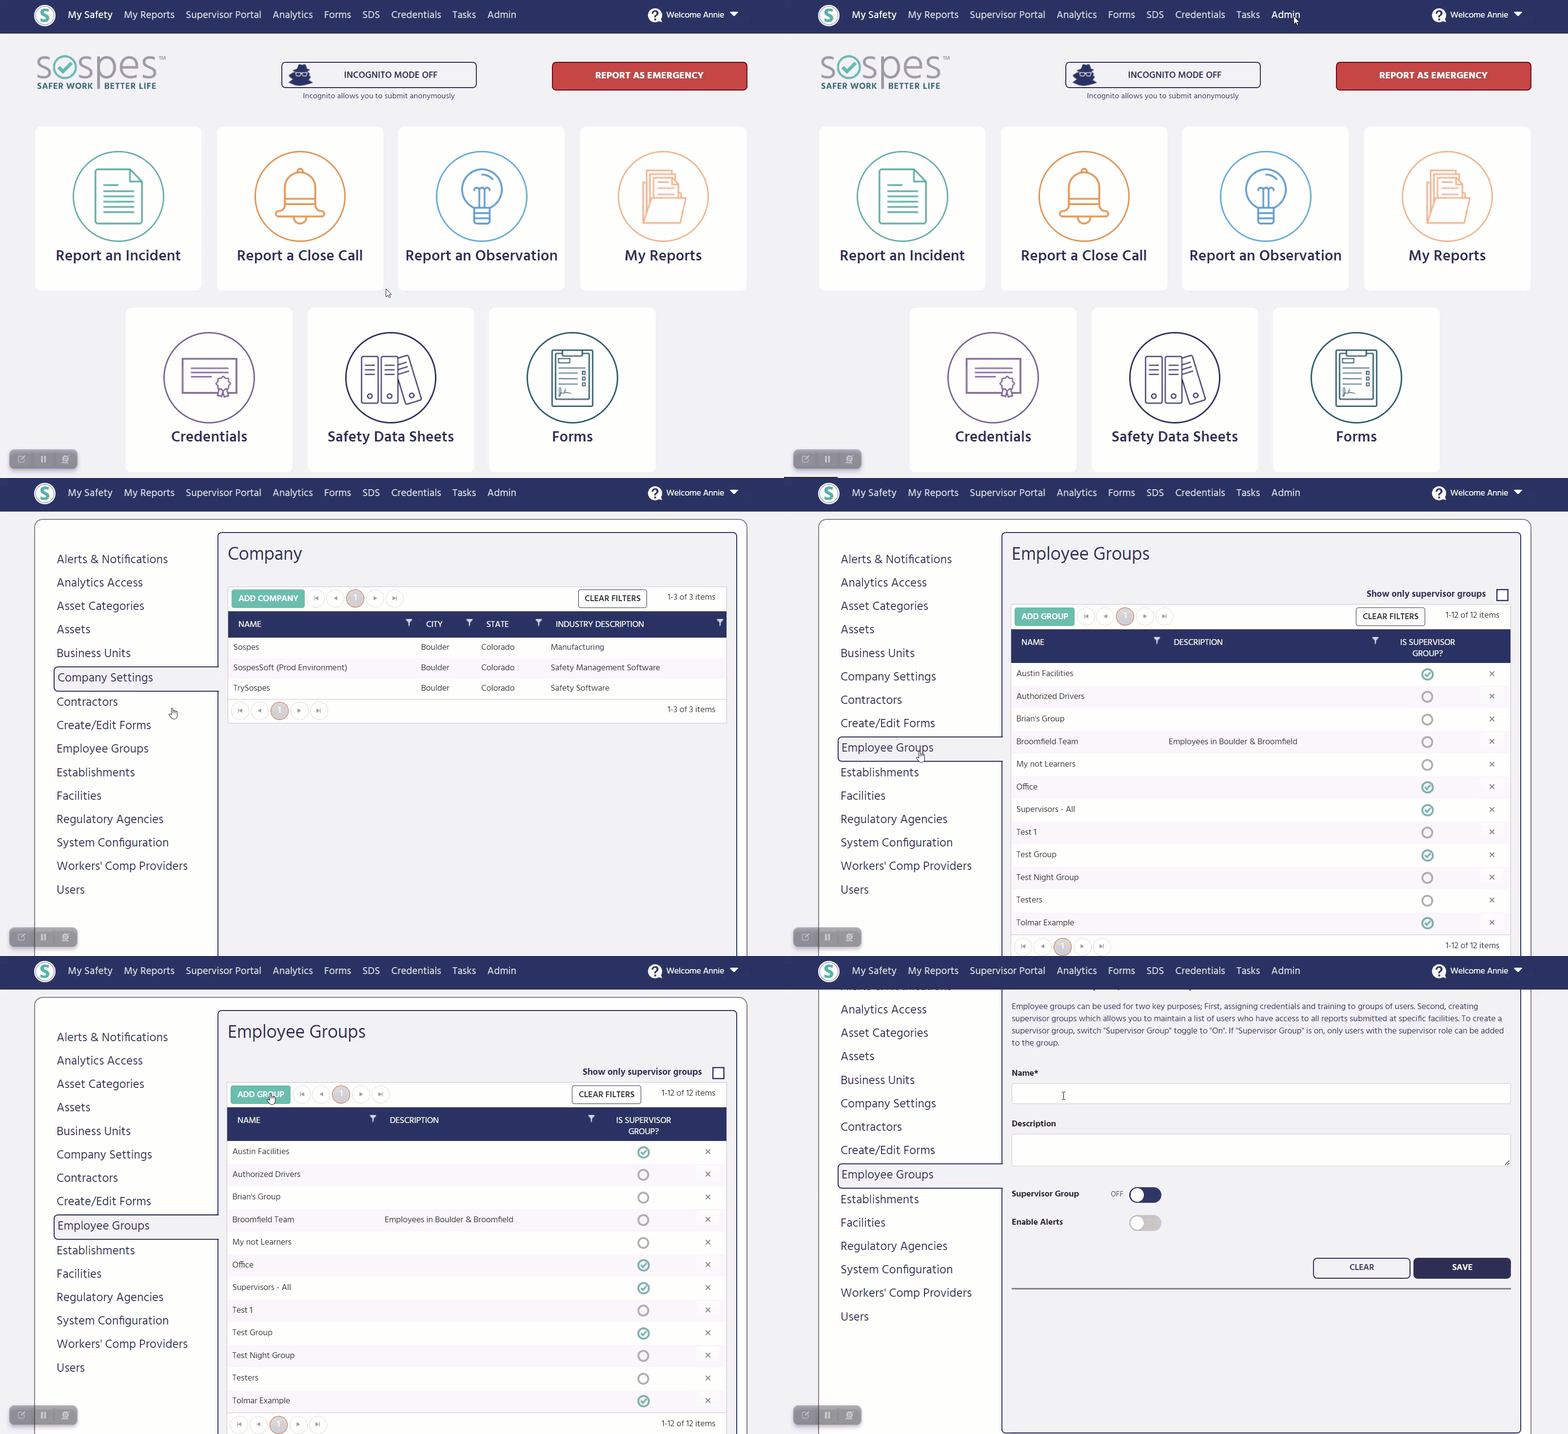
This article will walk you through the purpose of employee groups and how to create/edit them.
Creating Employee Groups for Credentials
Any user with the Group Admin role can edit, create or delete existing groups. 
Creating/Editing a Group
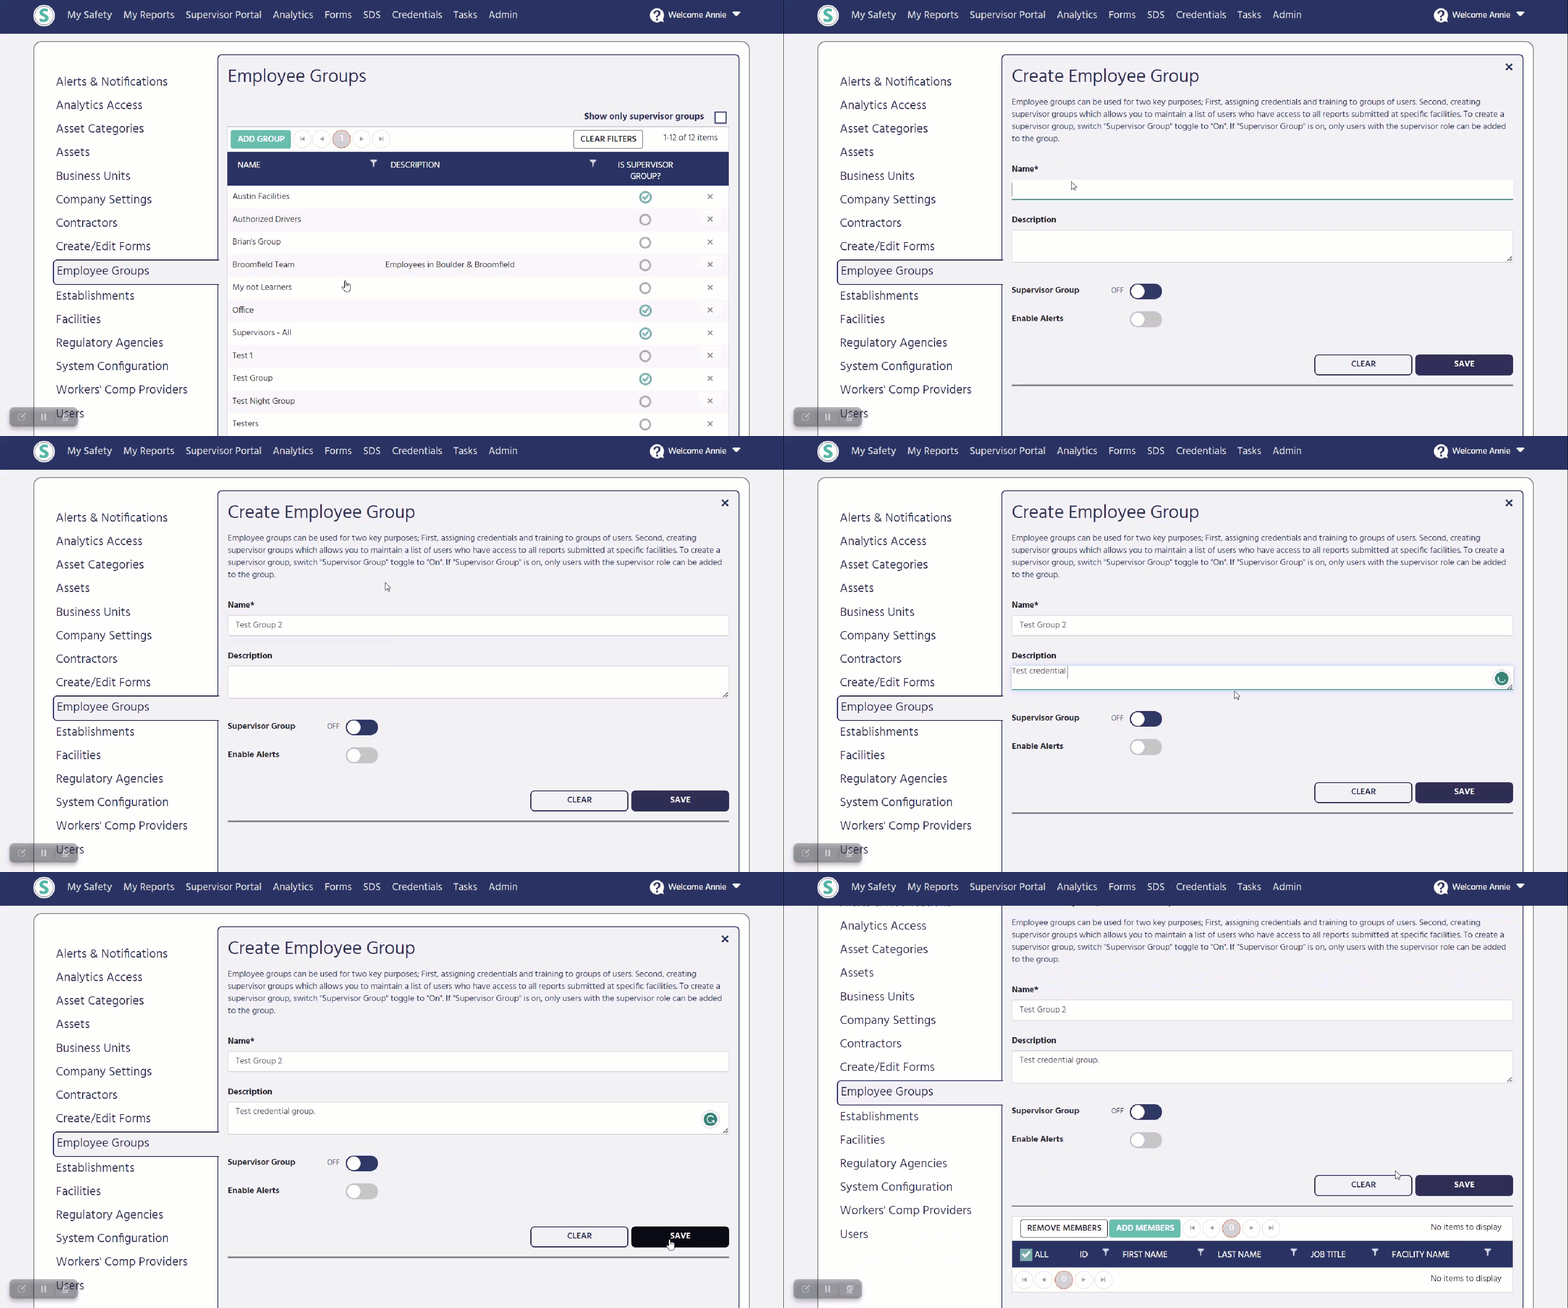
When creating or editing Employee Groups you will need to complete the following steps:
- Create a Name: Every employee group must have a name associated with it. i.e. "Sospes Welders". When creating these groups, it is recommended that you group employees that share a similarity, i.e. job title, common attributes, location, etc. If you follow this recommendation, it will allow you to organize and disperse employees easily. * Note: Employees can be associated with more than one group.
- Description: This provides a brief overview with details regarding the commonalities associated with those employees in the group. These details can include, job title, location, skills, duties, etc.
- Admins will be presented with the option to select "Supervisor Group"? Employee groups for credentials cannot be supervisory groups. Read more on supervisory groups here.
Once you have completed the required fields for the group, make sure you press "SAVE".

Adding/Removing Members from a Group
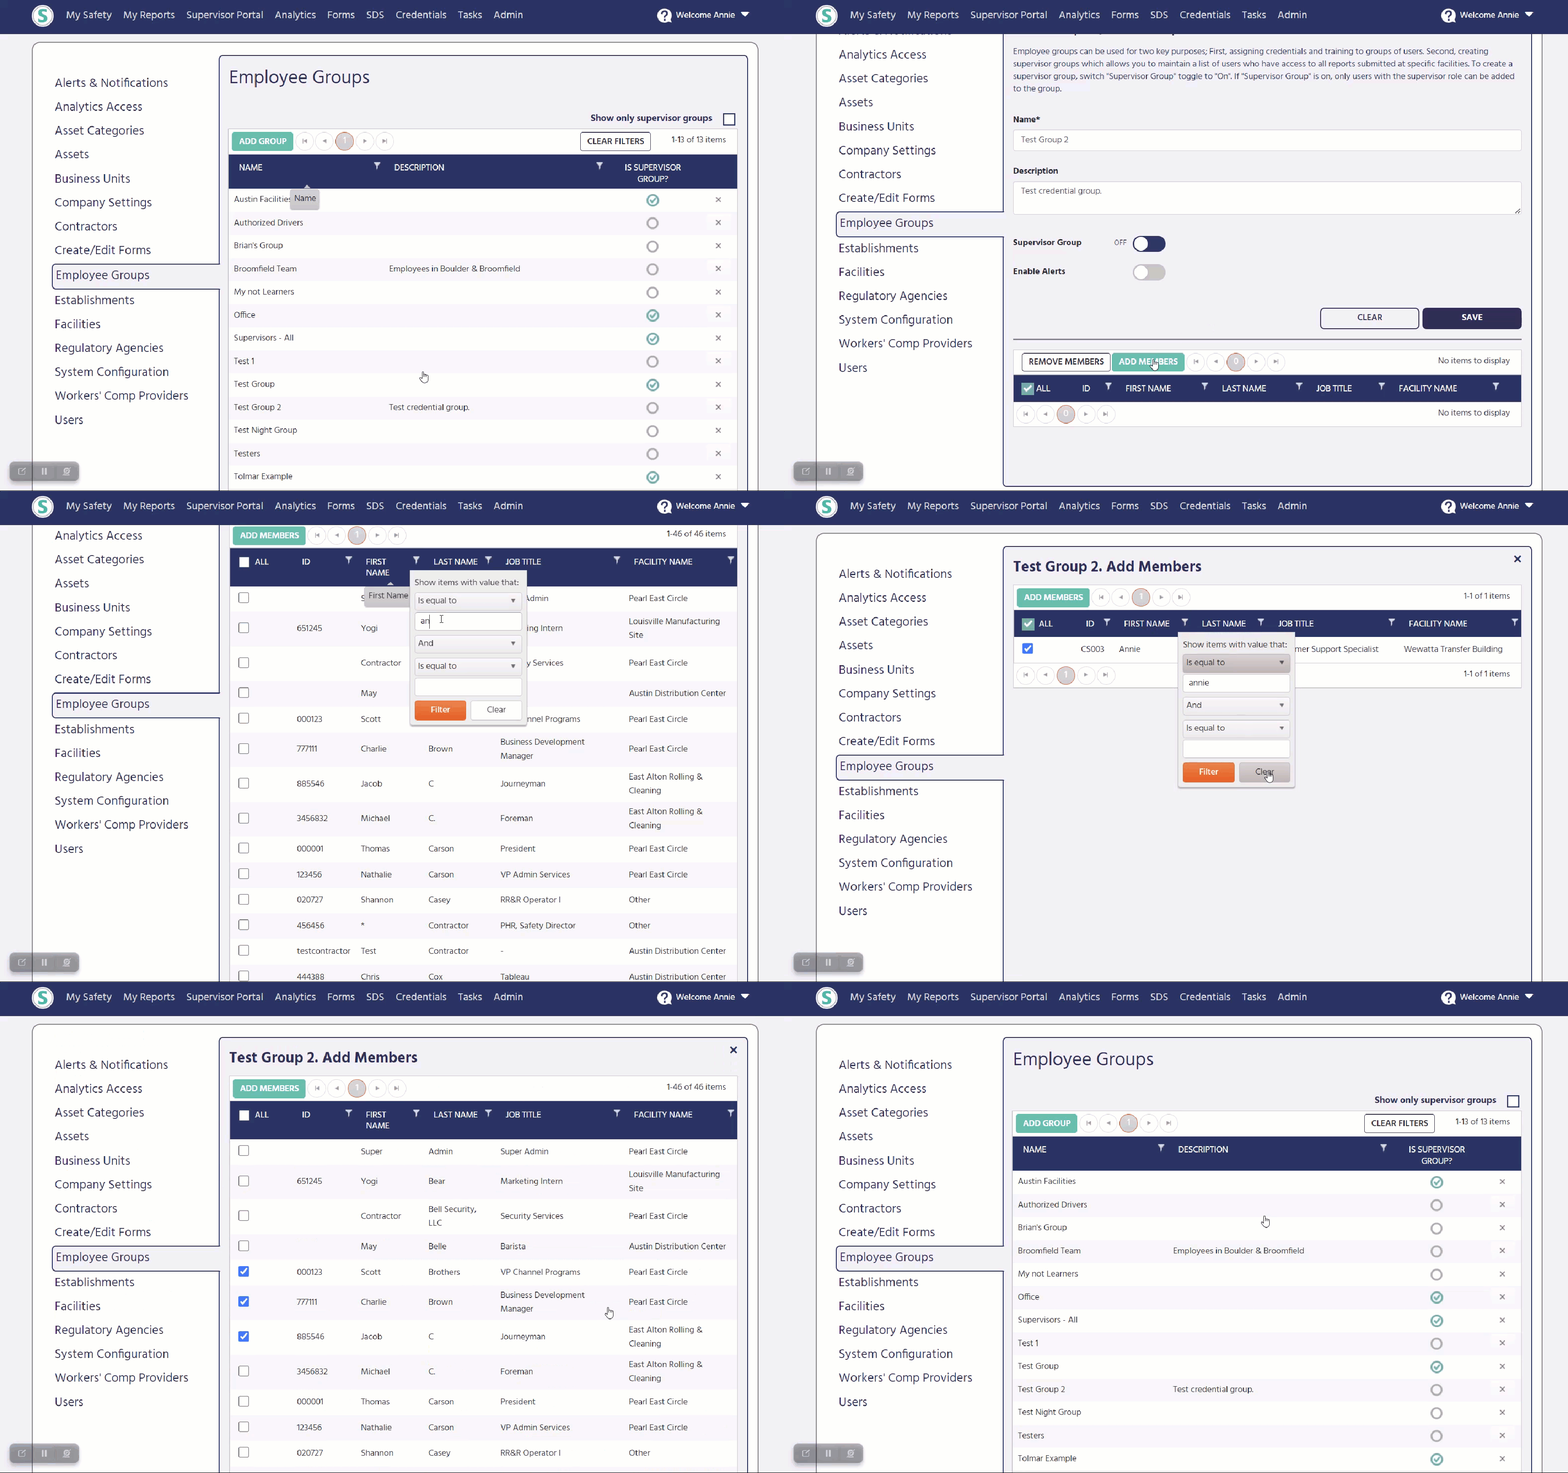
When creating or editing a group, you will need to "add" or "remove" members. When adding members, it is recommended to sort employees by using the filter icons to the right of each column header. When you click on the funnel icon, you will be given options to sort by.
- Is equal to
- Is not equal to
- Starts with
- Contains
- Ends with
Using this tool will give you the ability to sort and find employees more efficiently. i.e. if you created the group "Sospes Welders" and were looking to add welders, it's recommended that you use the Job Title filter and search for anyone with "welder" in their title. Once you have found the correct employees, you can select them individually by checking the box to the left, or you can select all by checking the top box. When finished adding employees to a group, be sure to press "ADD MEMBERS" to save your changes.

