
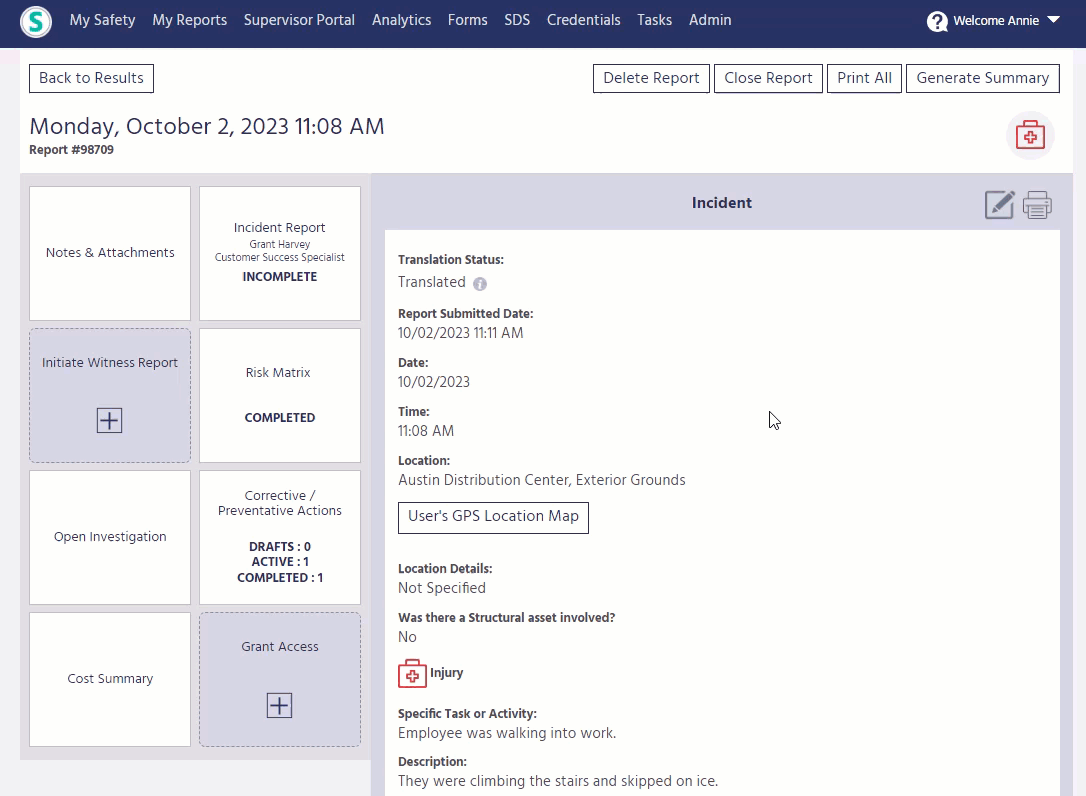
1. Go to the Supervisor Portal on the Sospes dashboard.
2. Select the Injury report that you would like to add lost time/days to. Note, only injuries can result in Lost Time.

3. Select and open the report.
4. Scroll down to the section question "Will injury result in lost time/days?"
5. Selecting "Yes" will display a table where you can input lost time associated with this injury.
6. Click on "Edit" below the dropdown box.
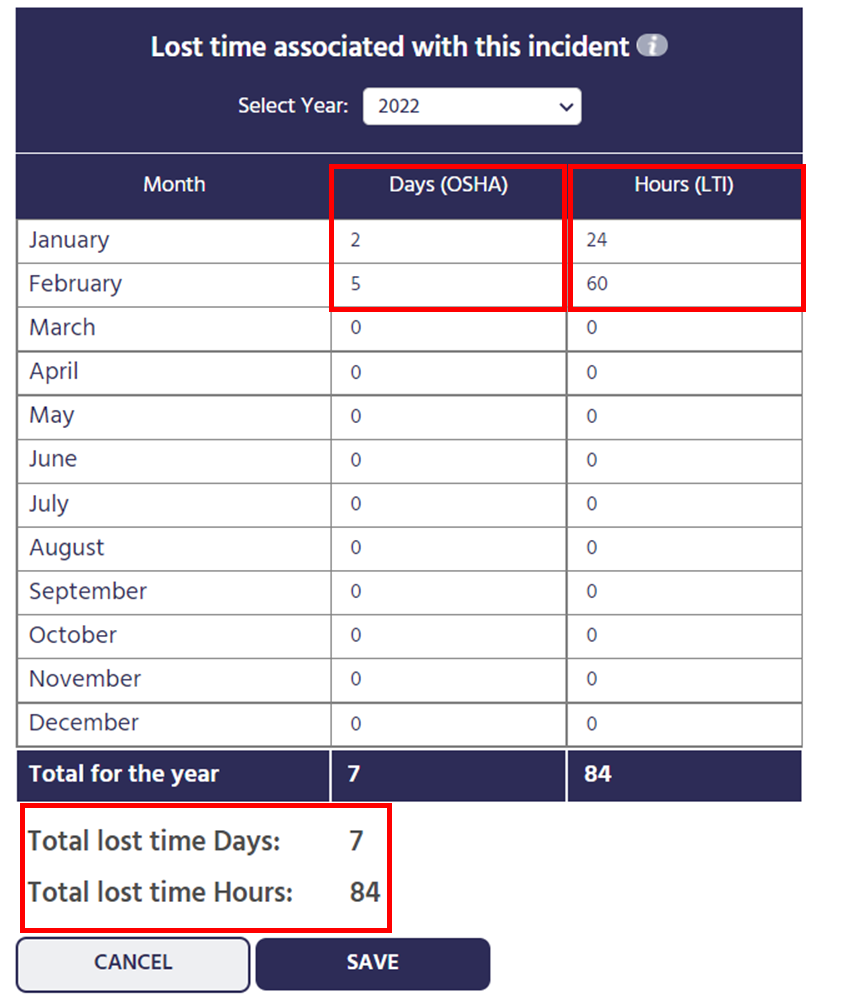
The first column, titled Days (OSHA), is designated for documenting lost days associated with this injury as is required by OSHA in the United States which is used in calculating things such as TRIR/TCIR or DART.
The second column, titled Hours (LTI) is designated for documenting lost hours associated with this injury. Lost hours is primarily used outside of the U.S. for documenting lost time with an injury.
These two columns are completely independent of one another and are designed for entirely separate rates and for different compliance reasons.
Example:
An employee is injured halfway through their Monday shift at one of your U.S. sites. The employee's normal shift is 8 hours per day, Monday through Friday. As a result of the injury they must miss the 4 remaining hours that same day (Monday). They then their entire 8 hour shift the following day (Tuesday) as well.
If you were to document this lost time in both hours and days, you most likely would fill out the applicable month as follows:
| Explanation | ||
| 12 Hours lost would be an acceptable amount for calculating LTO since the employee | 12 Lost Hours | Hours (LTI) |
| 1 Day lost for OSHA, because OSHA does not count the lost time for the day the incident occurred. Additionally, the missed Tuesday shift would be counted. | 1 Lost Day | Days (OSHA) |
It is most likely that you would only ever need to worry about one of these columns, however for some international organizations who compare incident rates globally it may be necessary to complete both.
9. Once you have logged the correct information in your incident report, click "SAVE" located below the table.
10. Finally, you will need to click "SAVE" at the bottom of the report to ensure all changes are updated.