
This page will walk you through how to report an observation while using a computer.
Observations are a quick and easy way to document things in the field. Sometimes referred to as a “BBS” report or a “Make Us Better,” these simple submissions can play a huge role in reducing incident rates and improving employee engagement.
|
|
To report an observation on a computer, go to go.sospes.com and log in to Sospes using your username and password. Once logged in, navigate to the My Safety page. If you do not have the supervisor role, you may be on this page by default. From the My Safety page, click Report an Observation. |
Completing an Observation
What location is associated with your observation?
 Facility
The next step in completing this report is to identify the relevant facility for this report. To do this:
- The first box, on the left, is the facility dropdown. When you first begin a report this may default to your home facility. If the report you are completing does not apply to the displayed facility, click the facility dropdown. This will open a dropdown list containing your company’s preconfigured facilities.
- You can also search for the facility by clicking on SEARCH and typing in the name of the facility until it appears in the dropdown list and then clicking it.
- Click on the facility from the list that best describes the relevant facility for this report.
Location
Once you have the facility selected, the next step is to identify a location within the previously selected location facility, to which this report applies. To do this:
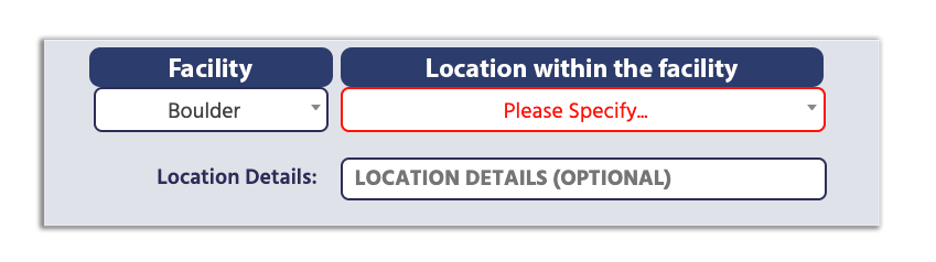
- Click the dropdown box directly to the right of the facility box, by default it will display Please Specify. This will open a dropdown list containing a preconfigured list of locations specific to the facility you chose in the previous step.
- You can also search for the location by clicking on SEARCH and typing in the name of the facility until it appears in the dropdown list.
- Selecting “Other” as the location for your report will generate an additional freeform text box, outlined in red, where you will need to describe the location. This “Other” option should be used when none of the pre-populated locations are applicable to your observation.
- Click on the location that best describes where your report applies to select it.
Example of facility and location:
Let’s say your company has the following facilities and locations set up:
Denver Site (Facility)
- Parking Lot (Location)
- Office (Location)
- Warehouse (Location)
Boulder Site (Facility)
- Parking Lot (Location)
- Rooftop (Location)
- Lobby (Location)
Using this example, if you are reporting an injury that occurred while working in the Denver Warehouse area, you would select “Denver Site” as your facility and “Warehouse” as your location.
Location Details
This is an optional field that can be used to further define a location. To do this:
- Click on the text box labeled Location Details and type in any additional details of the location.
Using our above example:
Facility = Denver Site
Location = Warehouse
Location Details = North emergency exit
Observation Type
The next step is to select the Observation Type. You must select one of the following:
-
- Positive Behavior
You witness a person perform a best practice or see a good condition somewhere in your workplace.
Example: You see a coworker use stop work authority to make a job site safe for a new hire. - At-risk Behavior
You observe a behavior that puts people or property at risk. This report is designed to document behaviors, poor processes but not specific employees. The goal is to improve organizational procedures, not “call out” specific persons.
Example: Vehicles tend to speed through the back alley. - Substandard Condition
It comes to your attention that a condition in the environment is potentially hazardous.
Example: A handrail in a stairway is not securely fastened and could potentially detach from the wall. - Suggestion
These are potential improvements or ideas for your workplace that may make people safer, happier or more efficient. Similar to a comment card.
Example: An official Lockout / Tagout procedure for Line 1 doesn’t exist, we should create one.
- Positive Behavior
Describing the observation
What is your observation?
This section is for the full description of the observation. You are welcome to be as descriptive as you like, this should be the detailed explanation. To do this:
- Move your cursor to the text box by clicking the Response.
- Using your computer's keyboard, begin typing. This field should be a full description of what you are reporting. The more descriptive, the better.
Example:
Observation type
At-risk behavior
What is your observation?
Steps 6 and 7 listed in the JSA for replacing the gearbox for Slitter #1 involves reaching your hand inside the machine where there are potential pinch points. There should be an addition of hand PPE as a requirement for this job.
Tell Us About It (Using Voice Recordings)
While using a computer you also have the option* of recording an audio file instead typing up your answers to the previous two questions. To do this:
- Begin recording by clicking on the Microphone icon. This will begin recording and display a STOP button.
- Begin speaking into your computer's microphone and describe what happened.
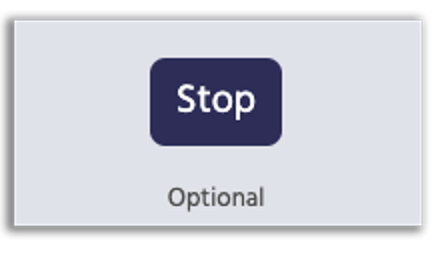
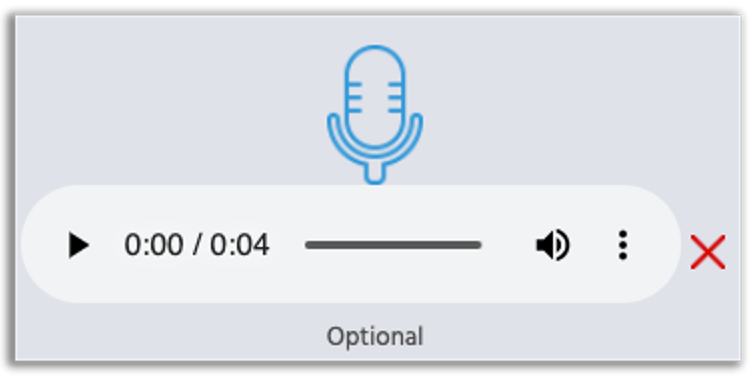
- Stop recording by clicking the STOP button. This will display a playback control that will allow you listen to your recording before you move on.
- To delete your voice record, click the red X on the playback control.
*Note: Your computer must have a microphone and speakers in order to use this functionality.
|
Just a Microphone |
STOP button |
Playback Control |
|
Click the microphone to begin. |
Click STOP to stop recording. |
Click play button to listen, X to delete. |
 |
 |
 |
Add some photos.
This next section gives you the opportunity to add photos to this report. Adding photos can help provide context for your report, communicate the circumstances better and it creates useful documentation. Adding photos in this section is optional so if you do not wish to add any, you may skip to the next section.
To add photos:
- Click the UPLOAD PHOTOS button. This will open a small, second window that will allow you to browse the files that are currently on the computer that you are using.
Note: Any photos that you would like to add to this report must be already stored on your computer. This means that if the photos that you wish to attach are currently on your mobile device, you will need to either fill out the report using the mobile app or transfer the photos to your computer.
- Once you have successfully added your first photo it will display a thumbnail version with a large white text box next to it. This white text box is where the photo’s description will go. Every photo must have its own description. Click anywhere in the white text box to place your cursor and begin typing.
- To remove a photo, click the red X next to its thumbnail. This will remove the image from the report.
- You may add as many photos as you like to this section of the report. Attaching any photos to this section of the report is optional.
Were Corrective/Preventative Actions taken?
This section that appears on all incidents, close calls and observations allows you to document any immediate corrective or preventative actions that were taken. Immediate Corrective/Preventative Actions are defined as action items taken at the time of submitting the report or shortly after in an effort to mitigated or improve the situation. This may not necessarily be the only action taken in response to this report, but rather just the immediate one.
- Click Yes to indicate that there were indeed actions taken. This will give you a place to document them.
- Click No to indicate that no actions have been taken.
Describe the corrective actions. (Result of Yes to Corrective/Preventative Actions question)
If you indicated that, yes, there were corrective/preventative actions taken then this question will appear. This section allows you to describe the action take to mitigate or improve the situation. To complete this section:
- Move your mouse over white text box where the word RESPONSE appears and click to move your cursor into the text box.
- Begin typing.
UPLOAD PHOTOS (Of the corrective/preventative action)
You also have the option of selecting photos that document the action that was taken. These photos should be specifically of the corrective/preventative action.
To add photos:
- Click the UPLOAD PHOTOS button. This will open a small, second window that will allow you to browse the files that are currently on the computer that you are using.
Note: Any photos that you would like to add to this report must be already stored on your computer. This means that if the photos that you wish to attach are currently on your mobile device, you will need to either fill out the report using the mobile app or transfer the photos to your computer.
- Once you have successfully added your first photo it will display a thumbnail version with a large white text box next to it. This white text box is where the photo’s description will go. Every photo must have its own description. Click anywhere in the white text box to place your cursor and begin typing.
- To remove a photo, click the red X next to its thumbnail. This will remove the image from the report.
- You may add as many photos as you like to this section of the report. Attaching any photos to this section of the report is optional.
Example:
Observation
Employee notices on a walkway that there is loose flooring.
Immediate Corrective/Preventative Actions
Placed cones around broken grating and taped off area to prevent people from entering the area until it can be fixed.
Submitting this Report
Once all required questions and fields are completed, you are ready to submit your report. The first step to do this on computer version of Sospes is by clicking the VIEW SUMMARY button at the bottom of the page.
Missing Fields (Report not submitting)
If a field is left blank or a question is missed, the report cannot be completed. Sospes reports must be entirely complete in order to submit them or move to the summary. If you receive a message indicating that you have a missing field, you will need to scroll back up and verify that all fields are complete.
Summary
On this page you can review all of the answers in your report. If you would like to edit any of the answers, click the red pen icon to the left of each section. This will take you back to that particular portion of the report so that changes can be made. To return to the Summary page, click VIEW SUMMARY at the bottom of the page again.
Submit
If you are content with all of your answers, scroll to the bottom of the summary screen and click the SUBMIT button. After submitting you will be returned to the My Safety page on go.sospes.com. Submitted reports go to the Supervisor Portal where they can be further management by users with the proper permissions.