
Learn how to report a Close Call in Sospes on desktop.
Close Calls, often referred to as near misses or near hits, are defined as narrowly avoided collisions or other accidents. According to the National Safety Council, 75% of all accidents are preceded by one or more near misses. Reporting Close Calls and taking corrective actions are a proven and effective way of reducing incidents.
 |
To report a Close Call on a computer, go to go.sospes.com and log in to the portal using your username and password. Once logged in, navigate to the My Safety page. If you do not have the supervisor role, you may be on this page by default. From the My Safety page, click Report a Close Call. You can also begin a Close Call report by beginning an incident report and selecting “no” for all five incident categories. |
Completing a Close Call
When did the incident occur and where did the incident occur?
Adjusting the date and time:
- The first step in completing an incident report is to record the date and time that the incident occurred. Sospes will automatically populate the date and time with the current date and time or you have the ability to adjust the date and time if it happened previously.
- You can also adjust the time by clicking on the clock icon to the right of the time text box. This will open a smaller window with an interactive clock face in it.
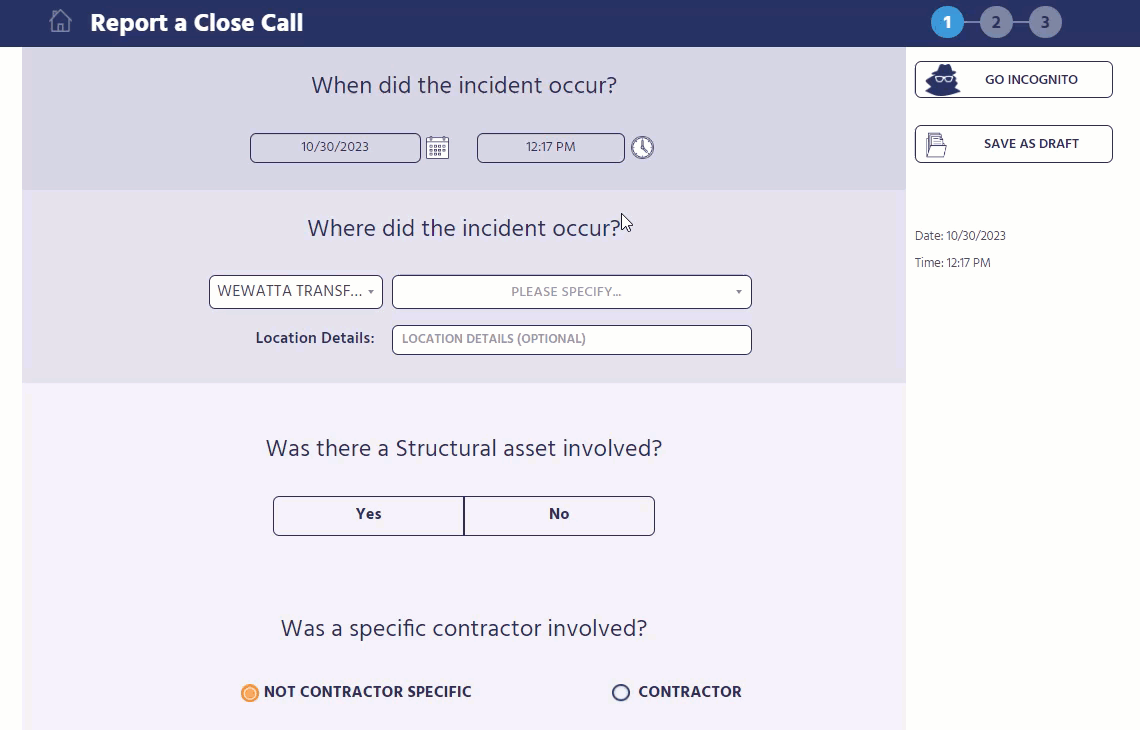
You can also search for the facility by clicking on SEARCH and typing in the name of the facility until it appears in the dropdown list and then clicking it.
Location Details
This is an optional field that can be used to further define a location. To do this:
- Click on the text box labeled Location Details and type in any additional details of the location.
Describing the Event
What was the specific activity or task involved?
This section is used to describe the event's narrative. There are two text boxes that appear on this screen, the top one if where you need to describe the specific activity or task involved in the event. This field should be used to describe the activity that led to the event. To do this:
- Move your cursor to the text box by clicking the Response field.
- Using your computer's keyboard, begin typing. This field should be a short description, one sentence maximum.
What happened?
This section is for the full narrative of what exactly happened. You are welcome to be as descriptive as you like, this should be the detailed explanation. To do this:
- Move your cursor to the text box by clicking the Response.
- Using your computer's keyboard, begin typing. This field should be a short description, one sentence maximum.
Example:
What was the specific activity or task involved?
Employee was lifting a box up onto a shelf.
What happened?
As the employee leaned over to pick up the box of product, they began to lift and felt a pinch in their lower back. This caused them to drop the product, damaging it as well. They continued to experience lower back pain after dropping the item.
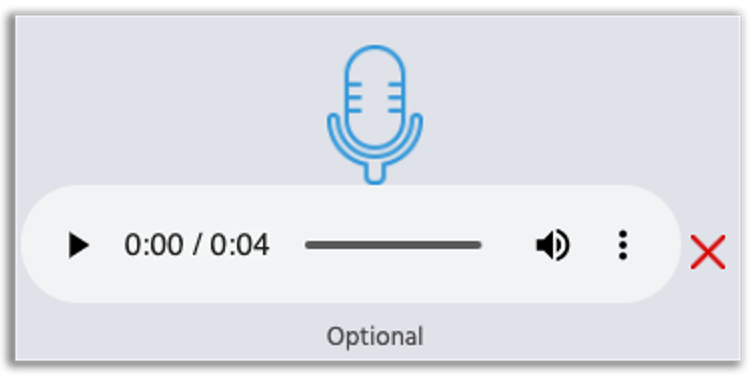
Tell Us About It (Using Voice Recordings)
While using a computer you also have the option* of recording an audio file instead typing up your answers to the previous two questions.
To do this:
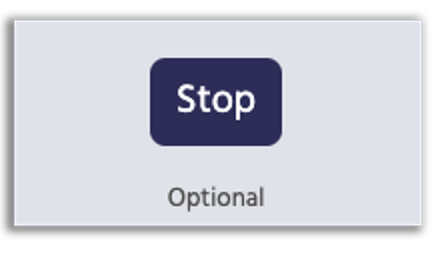
- Begin recording by clicking on the Microphone icon. This will begin recording and display a STOP button.
- Begin speaking into your computer's microphone and describe what happened.
- Stop recording by clicking the STOP button. This will display a playback control that will allow you listen to your recording before you move on.
- To delete your voice record, click the red X on the playback control.
*Note: Your computer must have a microphone and speakers in order to use this functionality.
|
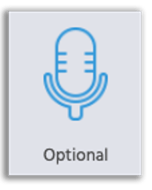
Just a Microphone |
STOP button |
Playback Control |
|
Click the microphone to begin. |
Click STOP to stop recording. |
Click play button to listen, X to delete. |
|
|
 |
 |
Add some photos.
This next section gives you the opportunity to add photos to this report. Adding photos can help provide context for your report, communicate the circumstances better and it creates useful documentation. Adding photos in this section is optional so if you do not wish to add any, you may skip to the next section.
To add photos:
- Click the UPLOAD PHOTOS button. This will open a small, second window that will allow you to browse the files that are currently on the computer that you are using.
Note: Any photos that you would like to add to this report must be already stored on your computer. This means that if the photos that you wish to attach are currently on your mobile device, you will need to either fill out the report using the mobile app or transfer the photos to your computer.
- Once you have successfully added your first photo it will display a thumbnail version with a large white text box next to it. This white text box is where the photo’s description will go. Every photo must have its own description. Click anywhere in the white text box to place your cursor and begin typing.
- To remove a photo, click the red X next to its thumbnail. This will remove the image from the report.
- You may add as many photos as you like to this section of the report. Attaching any photos to this section of the report is optional.
Were any of these involved in the incident?
You will then be asked to select each of the situations, if any, that the employee was working in when the incident occurred. Select all that apply. If none of the factors apply, select NONE OF THESE.
- RELEASE OF ENERGY (ELECTRICAL, STEAM, PNEUMATIC, CHEMICAL)
Energy sources including electrical, mechanical, hydraulic, pneumatic, chemical, thermal, or other sources in machines and equipment can be hazardous to workers. During the servicing and maintenance of machines and equipment, the unexpected startup or release of stored energy can result in serious injury or damage. - WORK AT HEIGHT
Working at height refers to work that takes place in any circumstance in which a fall could cause personal injury. This includes working on a ladder, a flat roof, or a fragile surface or even in an area near an opening in a floor or a hole in the ground. - LOCKOUT/TAGOUT
Lock Out, Tag Out is a safety procedure used in industry and research settings to ensure that dangerous machines are properly shut off and not able to be started up again prior to the completion of maintenance or repair work - MATERIALS HANDLING/LIFTING
Materials handling & lifting typically refers to the moving or handling things by lifting, lowering, pushing, pulling, carrying, holding, or restraining. This is the most common cause of occupational fatigue, low back pain and lower back injuries. - VEHICLE/MOBILE EQUIPMENT
Mobile equipment typically refers to equipment or machinery that is primarily designed for non-road use such as forklifts, cranes, etc. Vehicles are usually defined as manned machines that are mobile. - CONFINED SPACE
A confined space is a space with limited entry and egress and not suitable for human inhabitants. An example is the interior of a storage tank, occasionally entered by maintenance workers but not intended for human occupancy. - OVERHEAD WORK
Overhead work can be classified in two instances; Work that takes place above other workers or work that's being performed with arms raised above a worker's head. - NONE OF THESE
If none of the above apply, select this one.
Were you working in any of these situations?
You will then be asked to select each of the situations, if any, that you were working in when the incident occurred. Select all that apply. If none of the situations apply, select NONE OF THESE.
- INSPECTION/REPAIR/MAINTENANCE ACTIVITY
A maintenance activity is the process of repairing equipment or machines. - UNUSUAL/NON-ROUTINE/RUSHED WORK
Non-routine work are jobs and tasks that are performed irregularly or being performed for the first time. - SHUTDOWN/START-UP
Shutdown is what you do when you turn your process equipment off. Startup is what you do when you start your process equipment. - PROCESS UPSET/ABNORMAL CONDITION
Upset condition means a failure, breakdown, or malfunction of any piece of process equipment that causes, or has the potential to cause, excess injury or damage. - NO PRE-PLANNING
No pre-planning implies that there was a failure to prepare a plan, follow a plan or properly plan the execution of an action. - OVERTIME/EXTENDED HOURS
Any shift that incorporates more continuous hours, requires more consecutive days of work, or requires work during the evening should be considered extended or unusual. - NONE OF THESE
If none of the above apply, select this one.
What contributed to this incident?
Select all factors that contributed to this incident. If a factor is not listed, select OTHER and describe the factor in the text box by clicking in the text box outlined in red. By default, it will say PLEASE SPECIFY.
- WORK PROCEDURE/PRACTICE
Work procedures are standardized processes that outline how to conduct tasks with minimal risk to people, materials, and work environments. If there is procedure and there should be or if the procedure was not effective, check this box. - INSPECTION/MAINTENANCE PROCEDURES
Inspection and maintenance procedures are standardized processes that outline how to conduct maintenance tasks with minimal risk to people, materials, and work environments. If there is procedure and there should be or if the procedure was not effective, check this box. - INADEQUATE RESOURCES
If the resources provided for this task, such as PPE or personnel, were not adequate then check this box. - EQUIPMENT/TOOLS
If the equipment or tools contributed to this event by either being defective, inadequate or improper then check this box. - ENVIRONMENTAL FACTORS
Environmental factors include temperature, food, pollutants, population density, sound, light, and parasites. - DRUGS/ALCOHOL
If this event was the result of someone being impaired by drugs or alcohol, check this box. IMPORTANT NOTE: This classification may be handled differently by each organization. If you are unsure about how to answer this, contact your organization’s safety team or HR team. - COMPLACENCY
If this event resulted from a lack of focus, unawareness or ignorance of a hazardous condition, check this box. - DISTRACTION BY DEVICE OR ACTIVITY
If this event resulted from someone being distracted by a mobile device or other non-work related activity, check this box. - OTHER
If none of the above options apply, check this box and fill in the free form text box that pops up.
Were Corrective/Preventative Actions taken?
This section that appears on all incidents, close calls and observations allows you to document any immediate corrective or preventative actions that were taken. Immediate Corrective/Preventative Actions are defined as action items taken at the time of submitting the report or shortly after in an effort to mitigated or improve the situation. This may not necessarily be the only action taken in response to this report, but rather just the immediate one.
- Click Yes to indicate that there were indeed actions taken. This will give you a place to document them.
- Click No to indicate that no actions have been taken. This will give you a place to describe how this could have been prevented.
Describe the corrective actions. (Result of Yes to Corrective/Preventative Actions question)
If you indicated that Yes, there were corrective/preventative actions taken, then this question will appear. This section allows you to describe the action take to mitigate or improve the situation. To complete this section:
- Move your mouse over white text box where the word RESPONSE appears and click to move your cursor into the text box.
- Begin typing.
UPLOAD PHOTOS (Of the corrective/preventative action)
You also have the option of selecting photos that document the action that was taken. These photos should be specifically of the corrective/preventative action.
To add photos:
- Click the UPLOAD PHOTOS button. This will open a small, second window that will allow you to browse the files that are currently on the computer that you are using.
Note: Any photos that you would like to add to this report must be already stored on your computer. This means that if the photos that you wish to attach are currently on your mobile device, you will need to either fill out the report using the mobile app or transfer the photos to your computer.
- Once you have successfully added your first photo it will display a thumbnail version with a large white text box next to it. This white text box is where the photo’s description will go. Every photo must have its own description. Click anywhere in the white text box to place your cursor and begin typing.
- To remove a photo, click the red X next to its thumbnail. This will remove the image from the report.
- You may add as many photos as you like to this section of the report. Attaching any photos to this section of the report is optional.
Example:
Incident
Employee stepped on walkway and loose flooring gave out beneath them resulting them injuring their leg.
Immediate Corrective/Preventative Actions
Placed cones around broken grating and taped off area to prevent other from entering the area until it can be fixed.
How can we prevent this from reoccurring? (Result of No Corrective/Preventative Actions)
If you indicated No to the question Were Corrective/Preventative Actions taken? indicating that no actions were taken, you will see this question. Answer this by providing details on how you believe this incident could have been avoided and how it can be prevented from happening in the future. Detailed suggestions can help the company take effective preventative/corrective actions. To do this:
- Move your mouse over white text box where the word RESPONSE appears and click to move your cursor into the text box.
- Begin typing.
Submitting this Report
Once all required questions and fields are completed, you are ready to submit your report. The first step to do this on computer version of Sospes is by clicking the VIEW SUMMARY button at the bottom of the page.
Missing Fields (Report not submitting)
If a field is left blank or a question is missed, the report cannot be completed. Sospes reports must be entirely complete in order to submit them or move to the summary. If you receive a message indicating that you have a missing field, you will need to scroll back up and verify that all fields are complete.
Summary
On this page you can review all of the answers in your report. If you would like to edit any of the answers, click the red pen icon to the left of each section. This will take you back to that particular portion of the report so that changes can be made. To return to the Summary page, click VIEW SUMMARY at the bottom of the page again.
Submit
If you are content with all of your answers, scroll to the bottom of the summary screen and click the SUBMIT button. After submitting you will be returned to the My Safety page on go.sospes.com. Submitted reports go to the Supervisor Portal where they can be further management by users with the proper permissions.